


LPG Camper Tanks for Campers, Caravans and Food Trucks
This article provides a comprehensive guide on the use, installation, and safety aspects of LPG Camper Tanks in recreational vehicles, in accordance with European standard EN 1949 and the Dutch NPR-2577 guideline.
This article has been removed and replaced by the tutorials below:
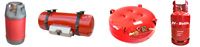
LPG Vapor Tanks for RV Campers, Caravans and Food Trucks
The following related tutorials are associated with this article:
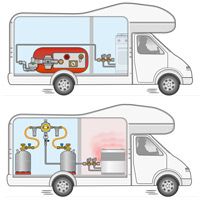
LPG installation in a recreational vehicle like a RV Camper, Caravan or Food Truck
LPG Vapor Tanks for RV Campers, Caravans and Food Trucks
Pressure Regulators for Gas Bottles and Vapor Tanks
Installation instructions for LPG cylinder tanks (vapor tanks) in (recreational) vehicles
The EN 1949 Standard: The European Standard for Safe LPG Systems in RVs and Caravans
What is an LPG Gas Bottle and what different types are there?
Comments
No comment at this time!
Leave your comment